Did you know? Regular preventative maintenance of injection molding tools like mold cavities is important to effectively fulfill plastic injection molding demands. Hence, manufacturing plastic products using the mold cavity isn’t the end of your tasks as a machine operator.
Instead, once you complete production work, maintaining the mold cavity is just as crucial as the manufacturing process. Besides, poorly maintained molds may produce parts that do not meet standards, resulting in increased downtime, waste of raw materials, and a negative impact on the bottom line.
Mold Cavity Maintenance Checklist:
Below are the eight key practices to consider when upkeep molding cavities that you use for plastic injection manufacturing tasks:
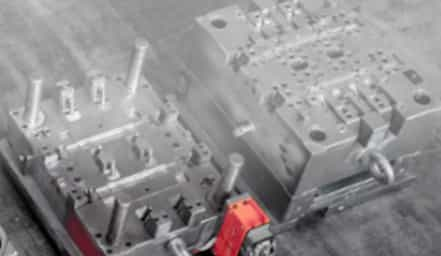
Frequently Analyze Mold Cavity Condition:
It is imperative to comprehensively inspect the injection molds before beginning a fresh manufacturing cycle. It is important to thoroughly inspect the surfaces of the injection molding die to ensure that they do not contain any plastic or other contaminants.
During mold injection, foreign debris could interfere when the tool clamps down, resulting in plastic seeping into the separating area. Additionally, it would be best if you were on the watch for any strange signs or damage on the mold’s surface.
Inspecting the completed component from the cycle before is another recommended best practice. This will serve as a reliable indicator of the performance of the mold. For instance, an excessive amount of flash on the parting line could indicate that the cavity and core of the injection mold are not clamping down properly.
Check to see that the shot counter is functioning appropriately. This counter maintains track of the total cycles and advises when you need to perform significant maintenance operations.
Clean It Up:
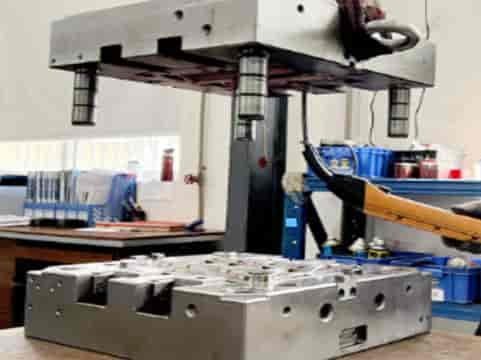
You should clean your mold after each production cycle to prevent the accumulation of foreign elements. You can clean it with the injection mold tool on the workbench or in the press.
On-bench cleaning takes place in conjunction with major injection molding maintenance activities. So you can do it less frequently than press mold cleaning, which occurs after each production cycle but before on-press cleaning.
Because different resins will leave their residue on the molds at different rates, the time required for the cleaning cycle will largely be determined by the resin used. Utilizing a cotton rag, apply a conventional degreaser or a gentle solvent on the mold and then wipe it down.
You can also clean the mold in place using other methods, such as dry ice blasting, which does not leave any residue behind.
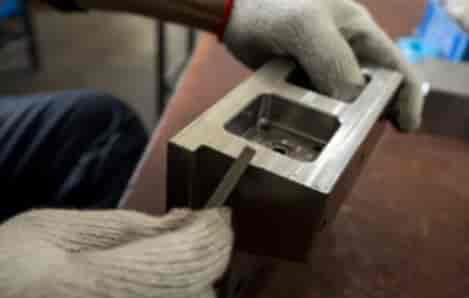
If the plastic molding tool has been disconnected from the machine to undergo more comprehensive maintenance, it is necessary to disassemble the tool and clean each component separately.
Using an ultrasonic bath to clean the components is one of the more effective approaches for accomplishing this goal. This enables you to clean every surface, even mold vents and cooling ducts, which are otherwise difficult to access.
Because certain materials do not lend themselves well to ultrasonic cleaning, focus more on the mold material. In this particular scenario, conventional cleaning methods are helpful.
Blow Out Dust And Dirt With Compressed Air:
During the cleaning process, you should also remove any debris or dust that may have formed on the surface of the mold. When the water used to clean the mold dries out, it may leave unsightly scale marks, particularly on highly polished molds.
After you clean them, dry the molds as quickly as possible. An injection molding technician could use compressed air to complete this task. Additionally, it is important to blow dry the cooling passages because it is easy for water to become trapped in these channels.
On the surface of the injection mold die, anti-rust coatings will cause particles of debris, such as dust or cotton fibers, to adhere.
They may eventually end up on the injection molded parts, so it is important to thoroughly inspect the mold surfaces after that. Maintaining the mold cavity is the best way to prevent such potential hazards.
Analyze Runner, Sprue, And Other Parts Of Mold Cavity:
It is essential to thoroughly inspect the mold’s runners, sprues, gates, and vents. All of these characteristics are necessary for effective production. Wear and material buildup are two of the most prevalent failure causes that can cause parts to stick to the injection molding tools.
Both of these issues can occur after improper maintenance. Because wear on molds is most likely to occur at the gate where the plastic enters, it is important to inspect this area carefully. Make sure that there is no buildup of plastic or surface defects on the runner or the sprue.
This is because these things can prevent plastic flow and cause it to stick. Scratches caused by prior unsuccessful attempts to remove sticky plastic can make the problem worse and make it easier for subsequent plastic to adhere.
In case of faults, you should clean and polish the sprues and runners again. Ensure there are no burrs on the tips of the hot runner nozzles.